Prepare Your Supplies and Bring Back Improvements
Prepare for your opening ANOMALITH dives by improving your handgun at the Workshop and checking your weapons, ammunition, healing supplies and Artifacts before departure. During exploration, combine gunfire with Anomalization Skills, transfer surplus materials through portals, and turn retrieved resources into useful upgrades and replenished supplies after returning.
Get Ready at the Base
- Improve handgun damage when the opening tutorial introduces the Workshop. The tutorial brings you through the base introductions and handgun enhancement before the hospital mission. Investing in the weapon you already use gives you a stronger starting point for ordinary encounters, without needing to choose a broader weapon setup immediately.
- Check your departure loadout for the weapons, ammunition and healing supplies you intend to use. Make this a deliberate stop before leaving the base, especially after a demanding dive. If your preferred firearm is short on ammunition, plan around another available weapon instead of relying on its upgraded damage alone.
- Equip useful Artifacts recovered during your investigations. Artifacts improve your stats, so compare their effects with how you actually fight: gunplay, skills or a steadier approach to exploration. Use what you obtain while progressing through missions, rather than making Artifact collection your main early objective.
- Practice at the shooting range if aiming, reloading or switching weapons still feels awkward. Its entrance is beside the Workshop counter, giving you a place to rehearse before the next investigation. Focus your practice on the operation that interrupted your last fight so your next loadout is easier to handle.
Make Gunfire Feed Your Anomalization Skills
- Land shots on enemies to replenish MP between skill uses. Aim at their weak points while doing so, checking the target instead of assuming every Anomaly has the same vulnerable area. This gives your ammunition a clear purpose in the combat loop: dealing damage while rebuilding the resource used by your skills.
- Time Parry to an enemy's attack cue, such as the glow that signals a parry opportunity. A successful Parry blocks the attack and creates an opening to respond. Because Parry consumes MP, avoid repeatedly using it without reading the incoming attack; that can leave less MP available for your other skills.
- Use Ripper Slash when weak-point gunfire or a successful Parry has created an opening. It is an early close-range skill, so using it brings you within reach of the enemy's attacks. Waiting for that opening reduces the risk of taking a hit while trying to land your own attack.
- Use a suitable Anomalization Skill or grenade when a group is consuming too much of your ammunition. Combining those options with gunfire gives you more ways to handle the encounter. Keep watching your remaining ammunition and MP so your next action fits the supplies you still have available.
Keep Materials Moving Out of Your Inventory
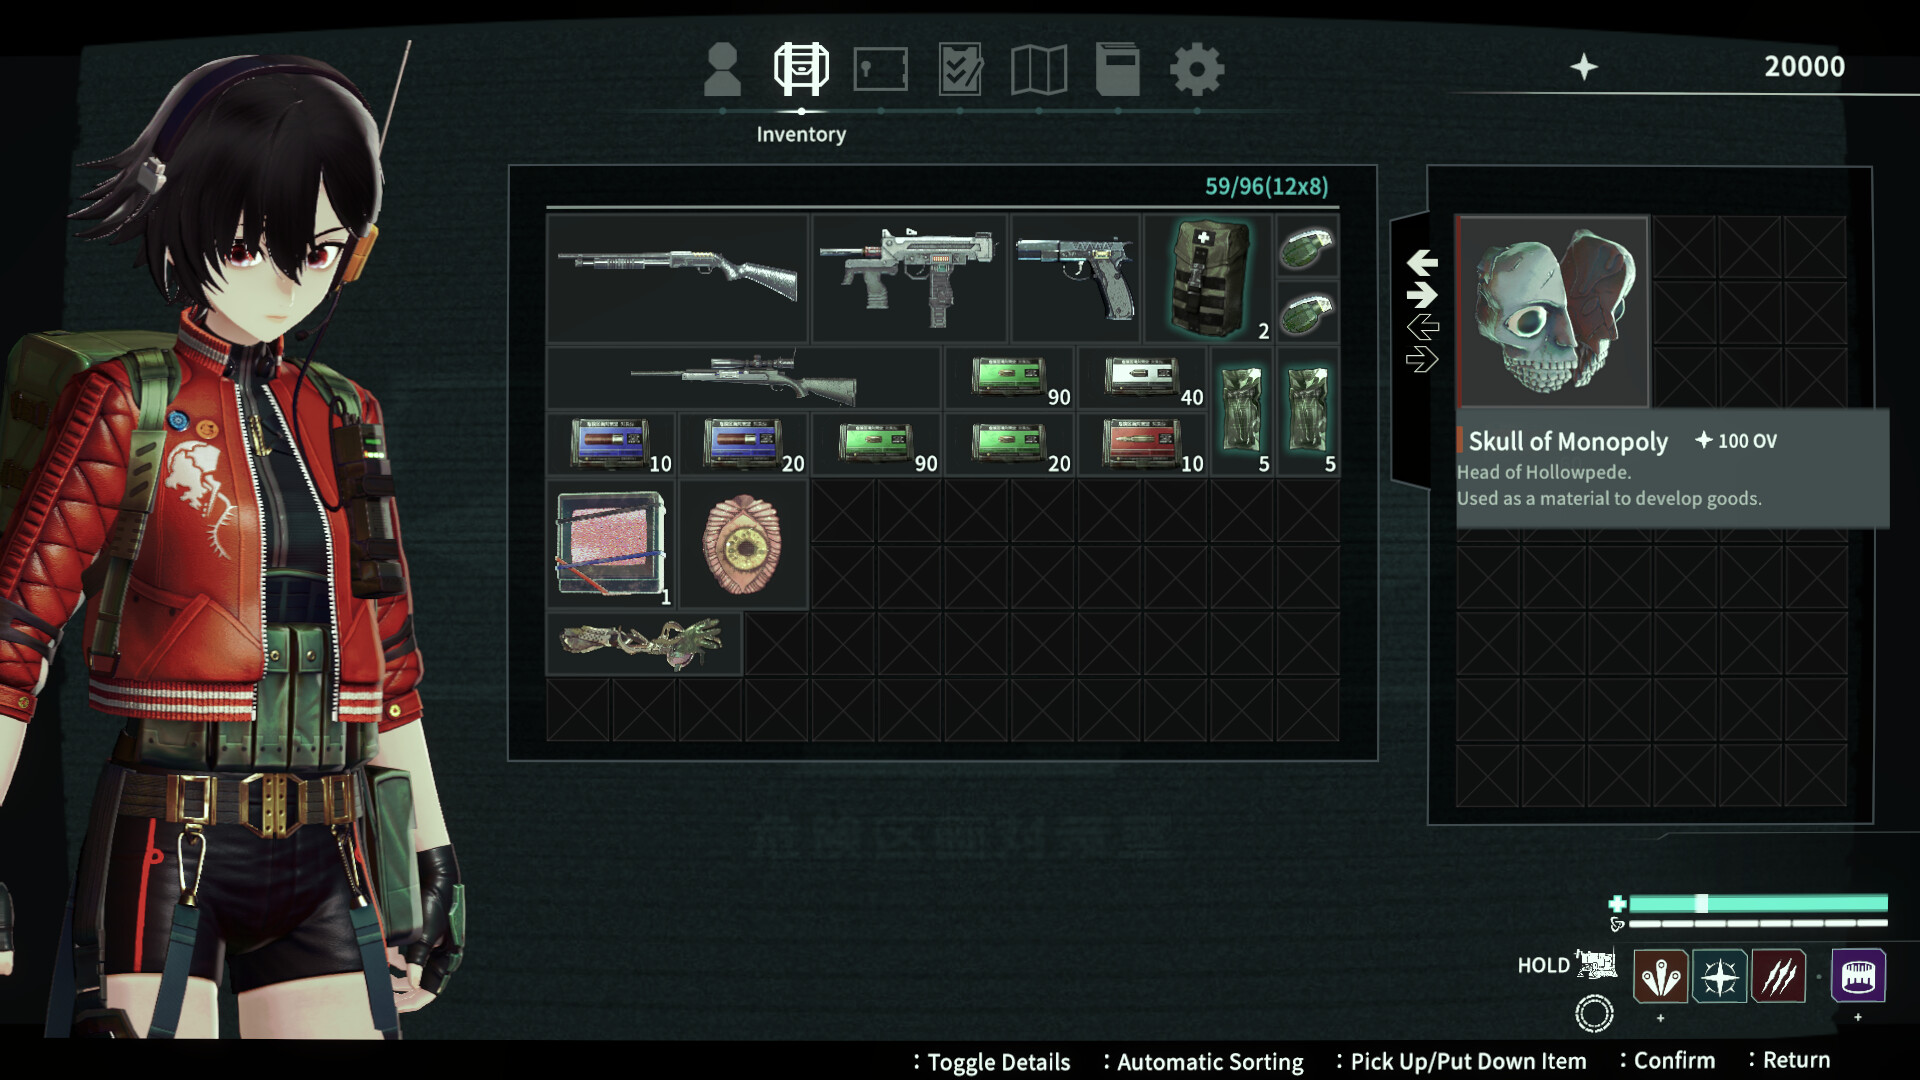
Your inventory space is limited, and items occupy different amounts of room. Keep the weapons, ammunition and healing items needed for the current investigation accessible while making space for retrieved materials. When room becomes tight, rearrangement and portal transfers are practical ways to keep collecting supplies.
- Use the indicator to search for nearby supplies before leaving an area. It helps you judge an item's direction and distance, which is useful around shelves and room corners. Include development materials in that search, since the Workshop gives those finds a purpose after you bring them back.
- Rearrange or rotate inventory items when a new find will not fit. Different item shapes can leave awkward gaps, so a crowded case does not always mean you must abandon the pickup. Try improving the layout before deciding that you need to return to a portal.
- Transfer surplus development materials to storage at an available portal. Portal locations are fixed, with prompts at places where they can be established, so use those opportunities while exploring. Sending materials away frees inventory space, but keep the ammunition and healing supplies you need to continue the investigation.
- Save through an available portal before continuing into a demanding encounter. Portals provide a save function during exploration, making them useful stops alongside their storage transfers. Before a boss fight, check your save situation at a usable saving point as well as your ammunition and healing supplies.
Turn Each Return Into a Better Loadout
- Prioritize an early backpack capacity upgrade, especially if inventory space kept interrupting your investigation. More carrying room supports material retrieval before you spread your investment across stronger firearms and attachments. Treat that capacity improvement as support for the whole retrieval loop, alongside the introductory handgun enhancement.
- Choose your next firearm improvement around a problem you encountered during the dive. Stronger weapons and attachments are useful development options, with recoil-control muzzle parts worth considering when recoil is troublesome. Attachments let you tailor a firearm to your combat style, so give the improvement a clear job.
- Develop protective gear or additional consumables when those needs become clear. Use the supplies you spent and the situations that caused trouble to guide that choice. This keeps retrieved materials connected to your next investigation instead of treating every available development option as equally urgent.
- Check the Workshop board for available side missions between main investigations. The requests available there change with your progress. If a mission you want is absent, advance the main missions and check again; side missions also provide more detail about the characters and their relationships.
- Replenish ammunition and healing supplies before your next departure. Returning with materials is only part of the loop; your next dive also needs a prepared loadout. Make replenishment part of every base visit so improvements do not send you back into a Zone with depleted supplies.
When a Portal Will Not Let You Return
Check your active mission objective if a portal will not let you return during the opening investigation. Returning can remain restricted until that mission is complete, even after you establish a portal. Follow the current objective to move the investigation forward, using available material transfers and saving functions along the way.